

Sometimes you want to display a message to the user of your application about error or information. But there is no MessageBox class in Windows 8 Store App. In this article we will show you how to display a message box to your application users.
Create a Blank Windows Store App
1. Open Visual Studio 2012 Express for Windows 8.
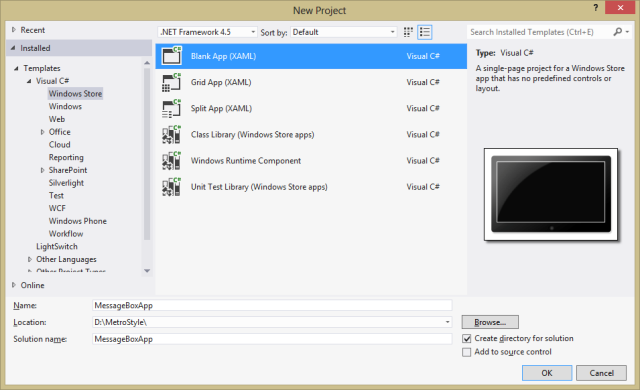
2. Click on New Project. The New Project Dialog box appears.
3. From the left pane select C# and then Windows Store Templates.
4. From the right pane select Blank App (XAML).
5. Type your project name and then click Ok. We set the project name to MessageBoxApp.
Create the UI and adding Xaml Code
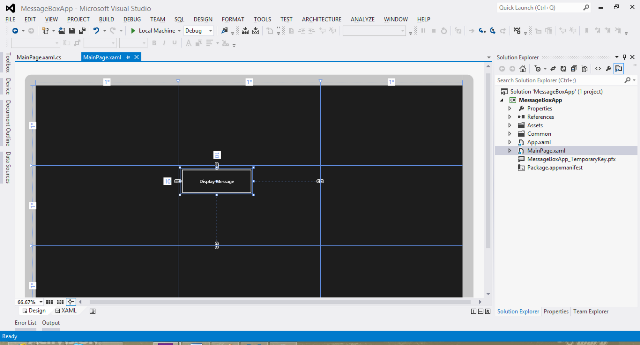
1. Open the MainPage.xaml file by double clicking the MainPage.xaml file from the Solution Explorer.
2. Select the XAML view and find the Grid Control in the MainPage.xaml.
3. Add the following code to the Grid in the MainPage.xaml.
<Grid Background="{StaticResource ApplicationPageBackgroundThemeBrush}">
<Grid.RowDefinitions>
<RowDefinition Height="1*"/>
<RowDefinition Height="1*"/>
<RowDefinition Height="1*"/>
</Grid.RowDefinitions>
<Grid.ColumnDefinitions>
<ColumnDefinition Width="1*"/>
<ColumnDefinition Width="1*"/>
<ColumnDefinition Width="1*"/>
</Grid.ColumnDefinitions>
<Button Name="DisplayMessageButton" Content="Display Message" HorizontalAlignment="Left" Grid.Row="1"
Grid.Column="1" Margin="10" VerticalAlignment="Top" Width="228" Height="80" />
</Grid>
a. The above code creates a Grid with 3 equal height rows and 3 equal width columns.
b. Add a Button control and name it DisplayMessageButton, sets its Content property to Display Message.
c. It places the button in second row using Grid.Row attached property and second column using Grid.Column attached property.
d. Sets the DisplayMessageButton width to 228 Device Independent Pixels (DIPs) and height to 80 DIPs.
e. Sets the DisplayMessageButton margin to 10 DIPs.
Adding C# Code and displaying Message Box
4. Double click the DisplayMessageButton to create the Event Handler for the Click Event.
5. Mark the DisplayMessageButton_Click method as asynchronous using the async keyword.
6. Add the following code to the click event handler.
private async void DisplayMessageButton_Click(object sender, RoutedEventArgs e)
{
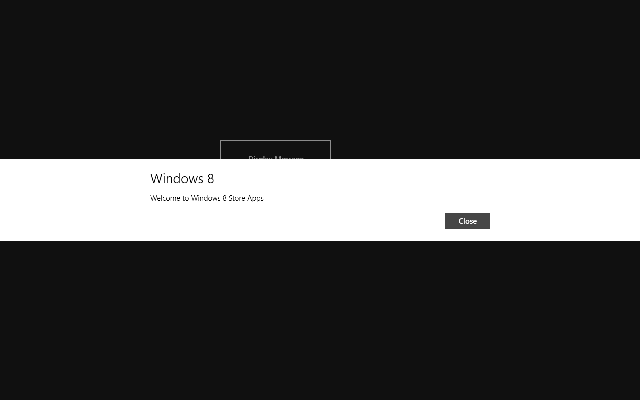
MessageDialog messageDialog = new MessageDialog("Welcome to Windows 8 Store Apps", "Windows 8");
await messageDialog.ShowAsync();
}
a. The above code simply creates an object of the MessageDialog class. This class represents a dialog. The dialog has a command bar that can support up to three commands. If you don't specify any commands, then a default command is added to close the dialog.
b. We set the content of the MessageDialog to "Welcome to Windows 8 Store Apps".
c. We set the title of the MessageDialog to "Windows 8".
d. Then we call the ShowAsync asynchronous method and we should mark this call with the await keyword you can read more about async and await keywords in Asynchronous Programming with Async and Await
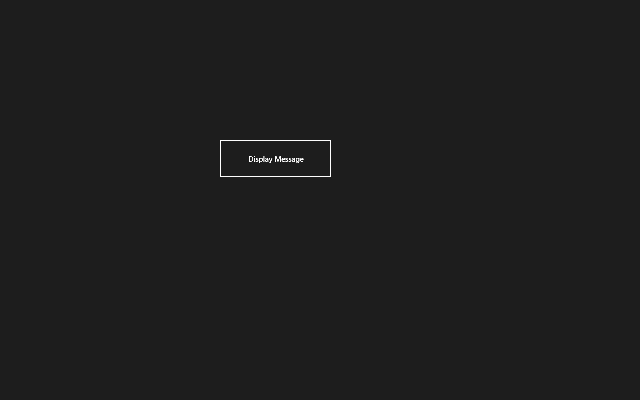
7. Build your application and run it in the Simulator. You will find something similar to the following image
8. Click on the DisplayMessage Button. This will show the Message Dialog with the title and content we set.
Now you have a Windows Store Application that displays a message box to your application users. Message dialogs should be used sparingly, and only for critical messages or simple questions that must block the user's flow.
15 March 2022

17 February 2022
09 December 2019